
Thanks a lot to Ben for sharing his darkroom set up with us and showing us that you can construct some of these things yourself with a little know how and determination!
What is your darkroom? A room, closet or bathroom?
About two years ago, after a hiatus from photography, I decided to buy myself a digital camera. It was my first digital camera and, really, I had no idea what to expect. The real excitement was in the thought of taking photos again. Once I got to shooting I found myself fairly bored with the digital process. A yearning for my old Pentax K1000 started to creep in and within a month my DSLR was up for sale and I was on the hunt for a manual film camera.
Once I found a camera, I wanted to start developing my own film, so I ordered the basics and made friends with my new darkroom – the bathroom. It was fun for a while until I wanted more out of my results. So, I decided that bigger was better, which is not necessarily true, and bought myself an iconic medium format camera; a Hasselblad 500 C/M. At this point, I switched from colour to black and white and was on the lookout for some instruction.
There is a lovely couple in town who teach darkroom courses at one of the local colleges. I signed up and started to delve into the process. It was there that I fell in love the art of black and white photography. It inspired me so much that I started to search out a place to build my very own darkroom. Going back to the bathroom was not going to be good enough anymore.
It was in August that I finally found an establishment that would allow me to install a darkroom. It was 80 sq ft of nothing. No water, drain, electrical, venting, walls or ceiling, but I was ecstatic. Luckily I have some carpentry experience and tools, otherwise this would have been too daunting. It took me four months to properly install everything and have it running. I've included some photos at the bottom of this post.
What's your all time favorite Film/Film developer combo?
Over the past while I have gone through some of the more popular developers like Rodinal or ID-11, but I wasn't getting the results I wanted. Not that those are bad developers, I was just in the market for something else. The film I shoot is HP5+, which is, for better or worse, what I have stuck with this whole time. After a bit of research I showed up at Beau one day and put an order in for some raw chemicals. A couple weeks later, I was mixing up a recipe for a two bath developer. It is an old recipe that was refined by the late Barry Thornton.
What result/look does this give?
The first roll I developed turned out superb! It was sharp, had good tonal range and the contrast was balanced. If you are not familiar with this type of developer, it is a compensating developer. It will do the same job as a stand development with a diluted developer, but in a much shorter time and produces reliable results.
What is the best processing tip you can give?
My advice to anyone out there who is as obsessed with this stuff as I am, is to be persistent, take lots of notes on everything you do, and move slowly through making changes. This will get you to a place where you can start to visualize ideas and have the tools to render them onto a print. When that happens, it is magical. Also, gut feelings are just as important as standardization. Almost 100% of the time that I have a gut feeling and act on it, it turns out great.

Enlarger is a Saunders/LPL 670DXL with Dichroic head. The colour has been removed and I use the Ilford multigrade system for contrast control.
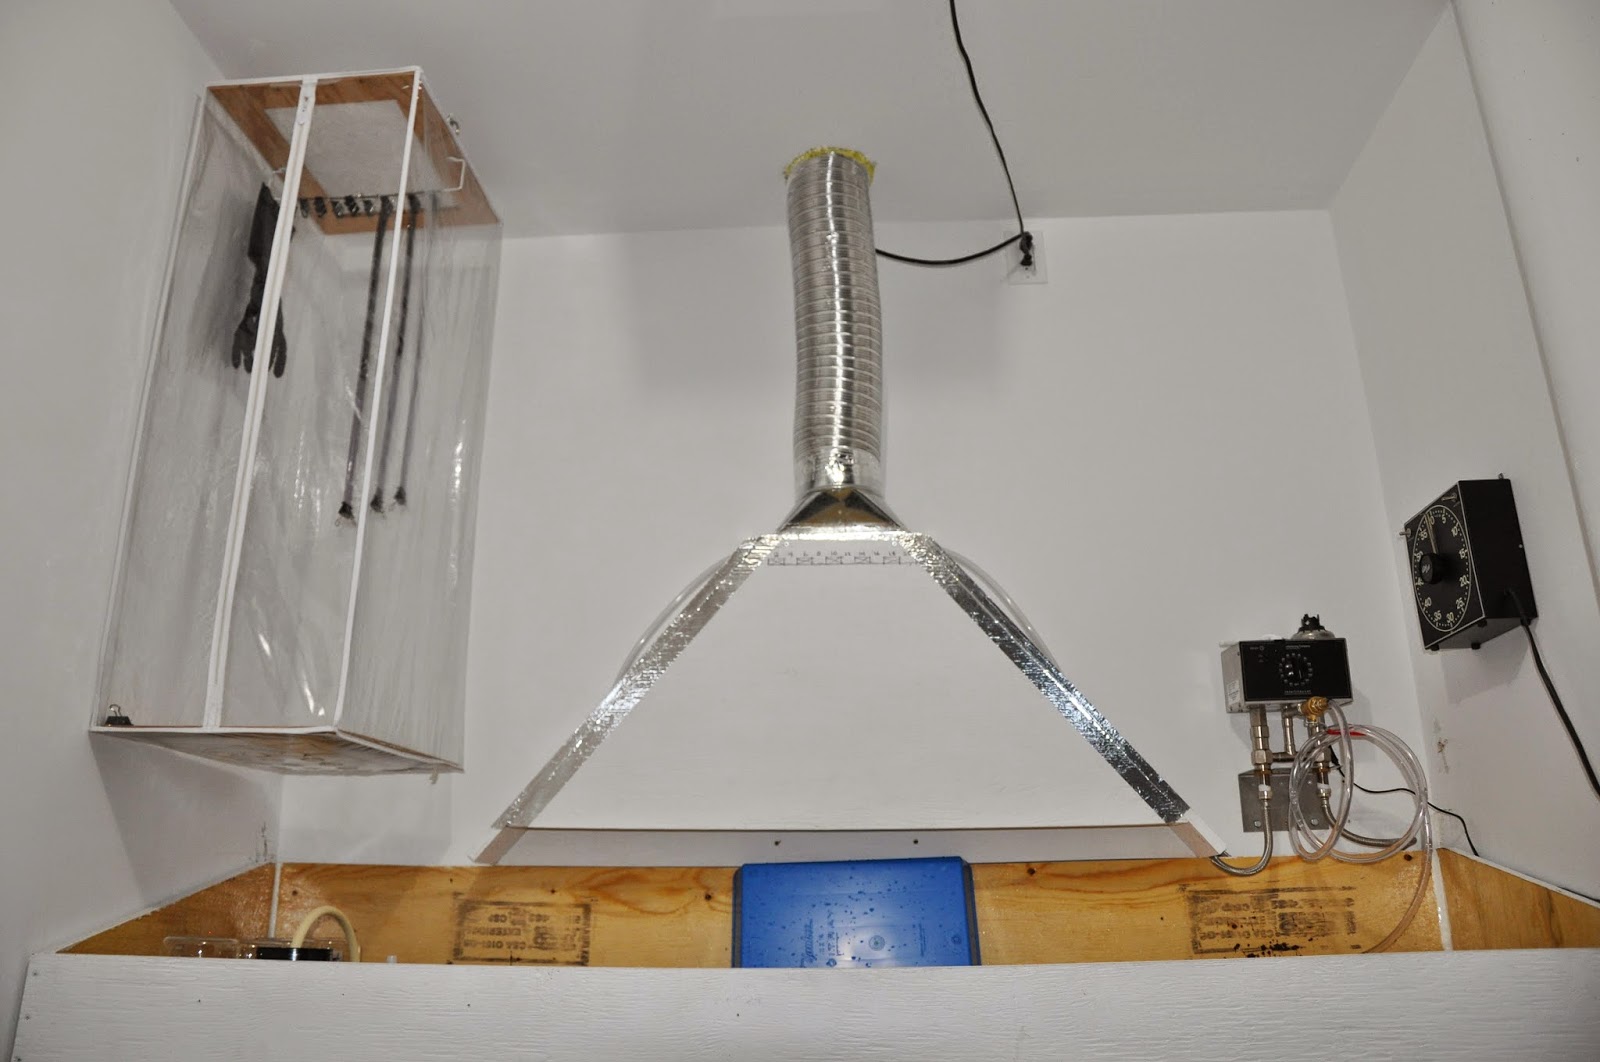
On the left is my homemade drying cabinet. In the middle is the negative venting hood. To the Right is an Intellifaucet D250, which controls the water temperature.

The sink is made out of plywood with 3 coats of marine grade epoxy for water proofing.

The room is completely air tight and this intake vent is the only way for air to enter. It is light tight and has a replaceable furnace filter inside.
No comments:
Post a Comment
This blog is no longer active. For current posts, see https://www.beauphoto.com/blog/
Note: Only a member of this blog may post a comment.